Jean LeLoup & Bob Ponterio
SUNY Cortland
© 2011 |
In a previous lesson we used Windows Movie Maker that comes with Windows to do basic video editing (trimming a shot or pasting two shots together). We have explored filming with a digital video camera, copying the video to the computer, using a digital still camera to get still photos and short video clips for use in projects. We also looked at using audio software to produce sound recordings, and these may be incorporated into a video by using a second audio track. Windows Movie Maker and Windows Live Moview Maker are free, and they are sufficient for many uses in classroom video projects. For slightly more money, one could use inexpensive software such as Adobe Premiere Elements for more sophisticated editing. On a Mac, you might use I-movie in a similar way. Let's walk through the process of creating a student video project WMM.
Always begin by planning the project using a storyboard. What will happen in each scene? What story will the scenes tell? What images will you use in each scene to communicate your ideas? What will each shot in a scene look like? How might you use sound to blend shots seamlessly for continuity? Will you record audio live or use dubbing? Will you be using only still images? Only video? A combination? Will you use background music?
It is possible to create a very simple video using still images of the participants, other people, or even cartoon characters with voice-over narration. The teacher might even prepare a collection of videos and still images in advance for students to use to produce their video skit. The less time the student needs to spend learning the technology, the more time will be available to focus on the content and language. Although projects of this sort can enhance motivation, a teacher should always be sure that the technology is not taking away from the main focus, working towards building language proficiancy. In other words, language & culture must be the primary fopcus of any project.
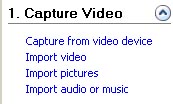 |
Open Windows Movie Maker and import any video, sounds, and still images that will be used in the project. Store audio, video, and images for a project in a way that will make it easy for you to find them and back them up for future edits. Any video equipment that you buy might come with its own video editing software which is likely to be easy to learn and might be sufficient for your needs.
If your software cannot read certain video formats or if it doesn't produce a final video in the format you want, you can use a free video converter such as Any Video Converter: http://www.any-video-converter.com/products/for_video_free/ (or Fremake Video Converter: http://www.freemake.com/free_video_converter/ ). For example, if your software produces WMV format, you can use the converters to change to MP4 format for use on the web. |
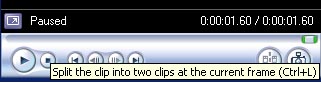 |
You may wish to crop or trim your individual video shots to make them the length that you wish and to improve continuity (seamless transition) between shots.
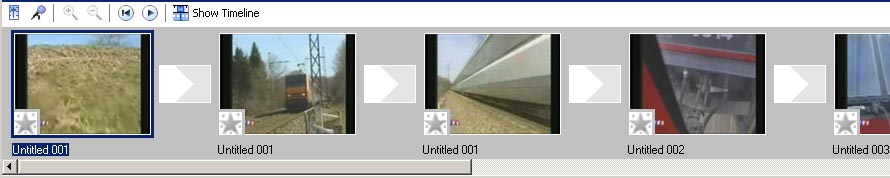
 It can be useful to give meaningful names to those shots that you intend to use later. It can be useful to give meaningful names to those shots that you intend to use later.
|
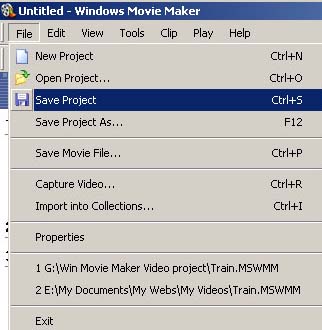 |
Always begin by saving your project with a meaningful name so you can find it later. Save your project from time to time, in case of crashes.
Video can take up a lot of space on your hard drive, so you might want to keep all pieces of a project together to make it easy to back it up to a DVD or some other medium for storage. |
Use Storyboard View to place your video shots and still images in the order that you have chosen. Each video or still can be seen in its own separate window. For larger projects, you might prefer to think of each scene as a separate project.
 |
Video effects such as blur, brightness, slow down, speed up can be dragged onto a shot to change the way a shot appears. Transitions such as fading from one shot to another can be dragged to the spot between shots to affect how one shot flows into the next. Transitions can be made shorter or longer, but remember that a transition will cause two shots to overlap, shortening the length of the scene.
Use effects and transitions with care. Neither is necessary for most projects, and they tend to be overused by novices. |
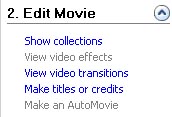
The Make titles or credits menu lets you create new shots including text for opening titles or ending credits. These will be inserted into your movie.
 |
Some basic audio features can be used in Windows Movie Maker by right-clicking on the audio portion of a clip. Audio mute, fade-in, fade-out, and volume provide basic controls. A second audio track can be used for inserted audio, music, or narration. This second audio track can replace the audio associated with a video clip (mute the original audio to do this). You could insert audio to accompany still images. You can also play more than one audio track at the same time.
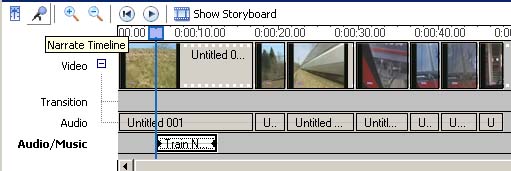
Audio can be created separately and imported into your project or you can create a voice narration directly within Movie Maker using your microphone. To do this, switch to the Timeline View and click the Narrate Timeline microphone button.
You can also grab the edge of an audio and drag to trim it. Grabbing the whole audio clip can let you move it, for instance to overlap two video clips for smoother transitions.
Get to know the audio features of your software because audio is so important in language projects! |
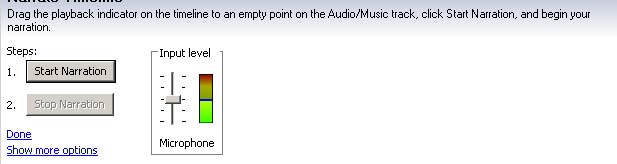
Here you can adjust your audio input level, select the location to begin your narration, then press Start Narration. The new narration audio appears in the Audio/Music track.
This feature can allow students to dub their own new audio over an image or previously recorded video.
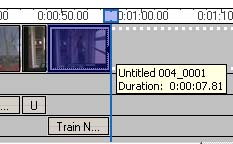 |
To associate some speech with an image, drag the image to the selected location in the timeline if it isn't already there. Record the voice using the Narration tool. Then drag the the new narration to the beginning of the place where the image starts in the timeline. Next, grab the edge of the image and drag it to make it as long or as short as the narration dub. |
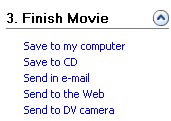 |
Be sure to Finish your movie when you are done. Use Save to my computer. |
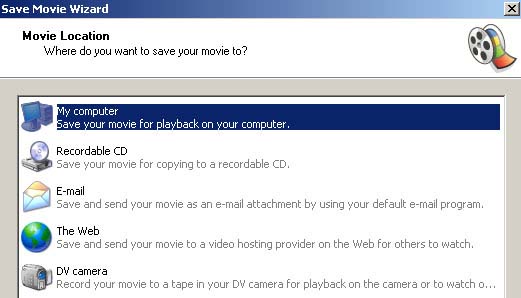
As always, there is no one right setting for your final video. Try out various settings to see which best suits your current project. Will the video be show on the Web? If so, you should use more compression. Is it for playback on a computer? In that case, a higher quality and larger file size may be better. Pay careful attention to where your final video is saved so you don't lose it. 

For a language class, keep student video projects simple to avoid a steep learning curve and reduce excessive time spent teaching about the technology instead of about the language. Encourage students to spend more time working on the language component of the project and less on the video component.
Return to Syllabus