Jean LeLoup & Bob Ponterio
SUNY Cortland
© 2017 |
Editing video with Windows Live Movie Maker
Windows Live Movie Maker is a free program that is part of Windows Live Essentials. You can download only the Movie Maker program rather than all of the applications that are included in Essentials. If the installation tries to install additional programs, you can decline them and just install Movie Maker (recommended).
http://windows.microsoft.com/en-us/windows-live/essentials
Windows Live Movie Maker is less powerful than many other programs for digital video editing, but it can handle the basics and it is easy to use. In many ways, it resembles iMovie.
There are also many other free or low cost simple video editors that are good enough for most school projects. AVS4you is an example:
http://www.avs4you.com/AVS-Video-Editor.aspx
You can use Windows Live Movie Maker to edit videos that you have captured with another device, and you can capture analog and digital video with Movie Maker as well. Let's walk through the process of creating a video with Movie Maker and a webcam.
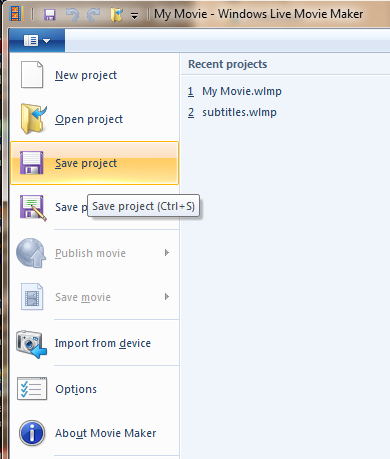 |
Always begin by saving your project with a meaningful name so you can find it later. Use Save Project to save your project from time to time, in case of crashes. Movie Maker projects have the extension wlmp. Remember that the project is NOT the same as the final video file that you will create using Save Video when done.
Choose whether you want to make a Standard square video (4:3) or a widescreen video (16:9). This might depend on your source video format (wide screen or square). This is found under the Project tab.
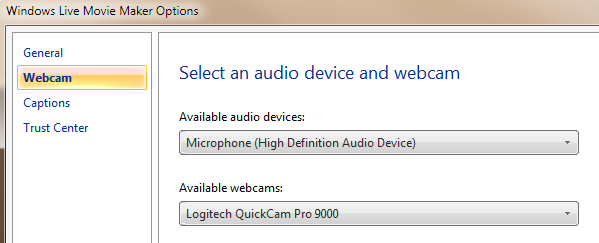
When your webcam is plugged in, Movie Maker can use it to get video & audio (or you could use a separate microphone and Audacity to create a voiceover audio track or download free music online or take music from an mp3 song).
The example below shows the presence of a Logitech QuickCam Pro 9000 webcam under Options/Webcam (or Audio & Video). |
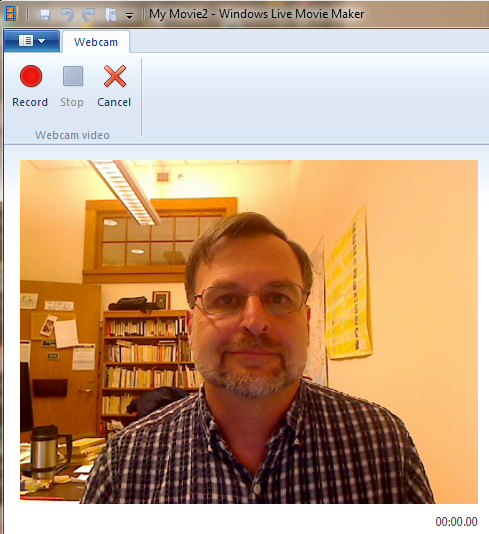 |
Capturing the video is as easy as hitting the red Record button. After the video has been captured, you will save it to your computer. Keep track of where you put the video file. It is a good idea to put all files for a project in the same location.
You can add additional videos, photos, or audio files to your project using the Add videos and photos or the Add music buttons in Movie Maker. |
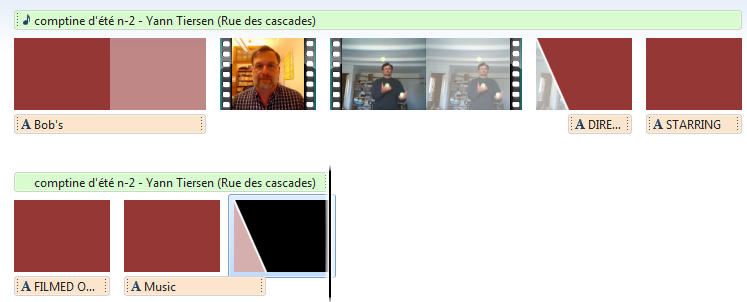
You can edit the video project by trimming or splitting individual clips and placing clips one after another. Clips may be easily moved around as well. Music can be added to parts of your video. You can also control the balance between the music and the sound from the video. You could also add a voice over track, depending on the needs of the project.
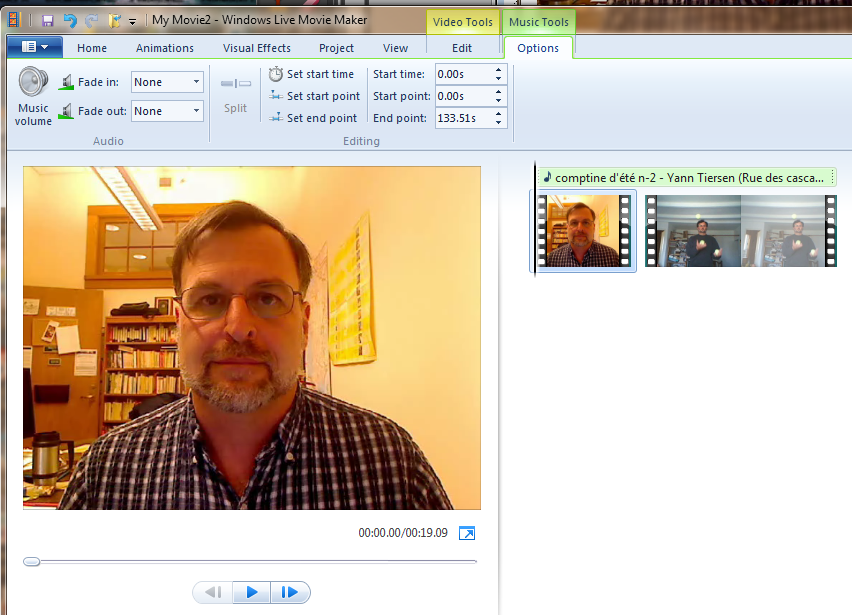
Animations allow transitions between clips. Fade in and fade out video or audio, etc.

 |
You can add captions or title and closing credits as well. Control the background and text colors and fonts. |
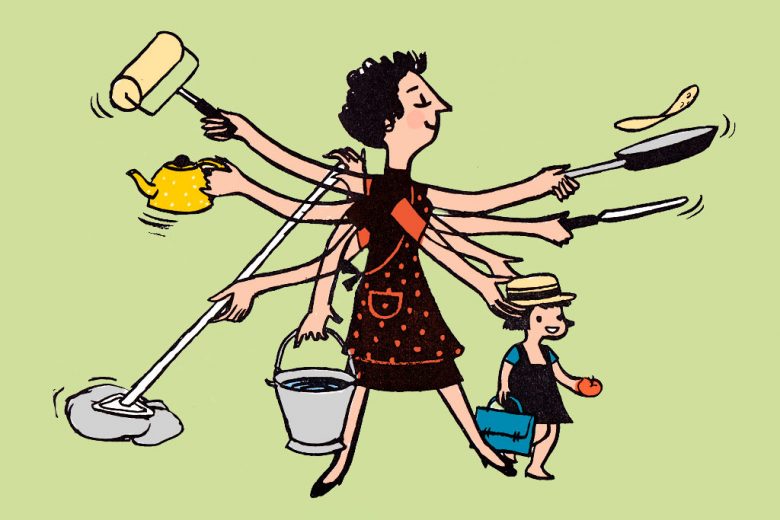
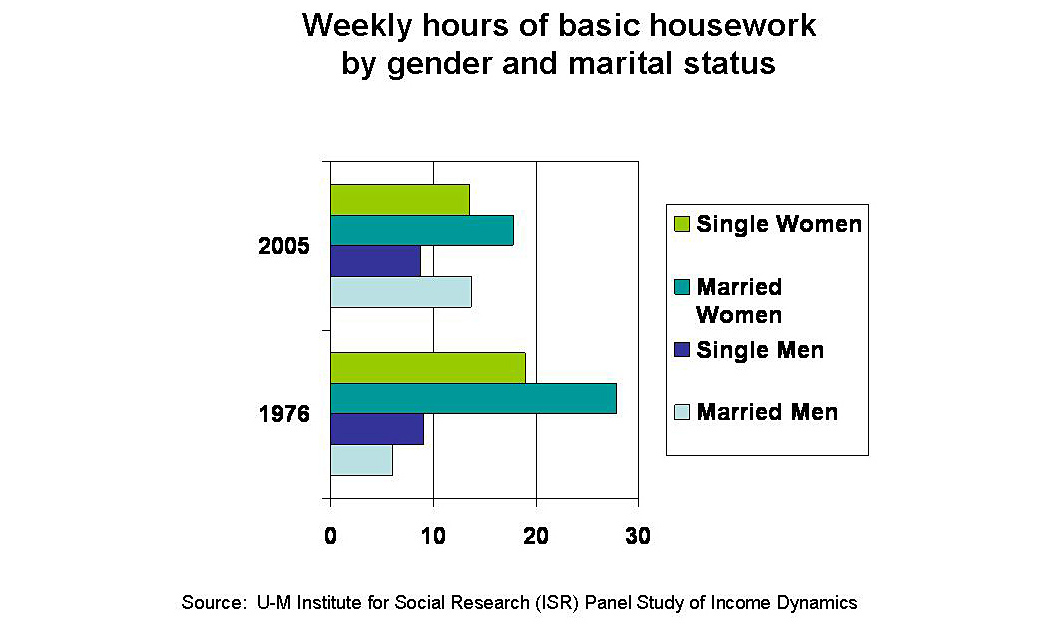
If you wish to experiment with editing a short video file, here is a video, and audio that you can download.
And here is a group of housework videos housework-1, housework-2, housework-3, housework-5, and a couple of images housework-780x520.jpg, stats.jpg, housework-2005.jpg. And here is a bit of music Clean Up Song for Children - Kindergarten and Preschool Song by ELF Learning.mp3. A webcam captured video (or make your own). Here is an image made from a powerpoint slide: housework-final.jpg. Try putting them together, eliminating the audio, and putting in your own voice-over. change the time setting on the images to fit your needed length.
|
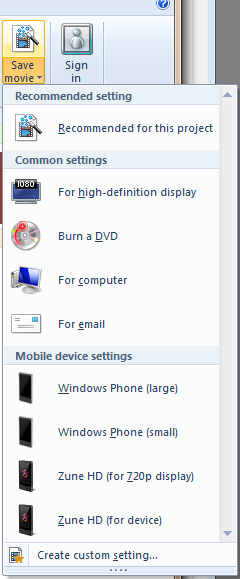 |
Once you have finished editing, you can save the movie. It is best to use the same video settings from start to stop of the project. However, you can also mix settings and save your final video in a different setting if you have reasons for doing so. For example, you might export a video in a smaller size with more compression for placement on the web. You could even save multiple copies in different sizes, one for the web, one for showing from your computer in class, and one for long-term storage on a DVD.
Recommended for this project should give you the best results for showinf on your computer in class. |
As always, there is no one right setting for your final video, though mp4 tends to work well for online video. Try out various settings to see which best suits your current project. You can also modify the video size and format later using other software. More on that later.
For more information:
Return to Syllabus