EDU 314 Teaching with Computers in Elementary and Middle Schools
Week 4 WebDesign and Publishing (PPT)To do this week
Basics of Web Design: from Web authoring to Publishing- the Whole Process
Step 1. Create a web page using Web Authoring Tool Nvu
1) Make a folder on a local drive
Make a folder on a local drive (desktop or your flash drive) and name it: "EDU314". You'll put all your ePortfoilo files in this folder, including images (.gif and .jpg).
I cannot emphasize enough how important it is to place all your files (html documents, images etc) in that single folder. Later, you can do things differently, but as a novice, you will avoid many frustrating broken links if you have all your documents in a single folder (without anothe layer of subfolder).
2) Open NVU and get familiar with it.
More tutorials for Nvu:
How to Design and Publish Your Website with Nvu
- Nvu Tutorial 1: How to Design and Publish Your Website with Nvu
- Nvu Tutorial 2: Adding Images, Changing Fonts, Changing Colours, Creating Links, Writing Your Content
- Nvu Tutorial 3: How to Create Data Tables
- Nvu Tutorial 4: How to Create a Multiple Column Layout for your Web Page in Nvu
- Nvu Tutorial 5: How to Add a Feedback Form to Your Website
- Review of Nvu, a Free Standalone WYSIWYG Web Editor
3) Create a file and name it "index.html" that will serve as your homepage
Create a nice looking page to serve as your "homepage." Save your page to your USB drive and name it "index.html"
[This is important: "index.html" is the standard or default filename for the first page in your web folder. Don't save it under any other name such as "myindex.html" or "index.html".]4) Check out how your page looks in a browser by opening it in NVU or Internet Explorer to see how it will look when you publish it.
5) At this point, you should have your homepage on your hard drive. The next step is to publish it to your Web folder at Cortland. You need to understand FTP ("File Transfer Protocol")
Step 2. Upload your file to your web folder on the Cortland Student Web Server
To publish your web pages, you need to understand how Cortland provides you with your web folder in your web space. Here are the step-by-step instructions.
6) Create a web folder
- Go to http://studentweb.cortland.edu and click the "Create a Web Account" link (for students).
- Click "Create My Web Account"
- Enter your Cortland NetID and password, then click OK
- Read the Terms of Service and press Continue
- Make sure you see a confirmation screen stating "Web Folder Created Successfully"
- Note down your web address (URL) given on the screen
For technical problems related to the web server that could not be solved after working with the instructor, you need to contact Technology Help Center through phone (607) 753-2500 or (607) 753-5599 or email at helpdesk@cortland.edu or go to Technology Help Center at Winchell Hall in person.
7) Publish the page - put pages in your Cortland Server web folder
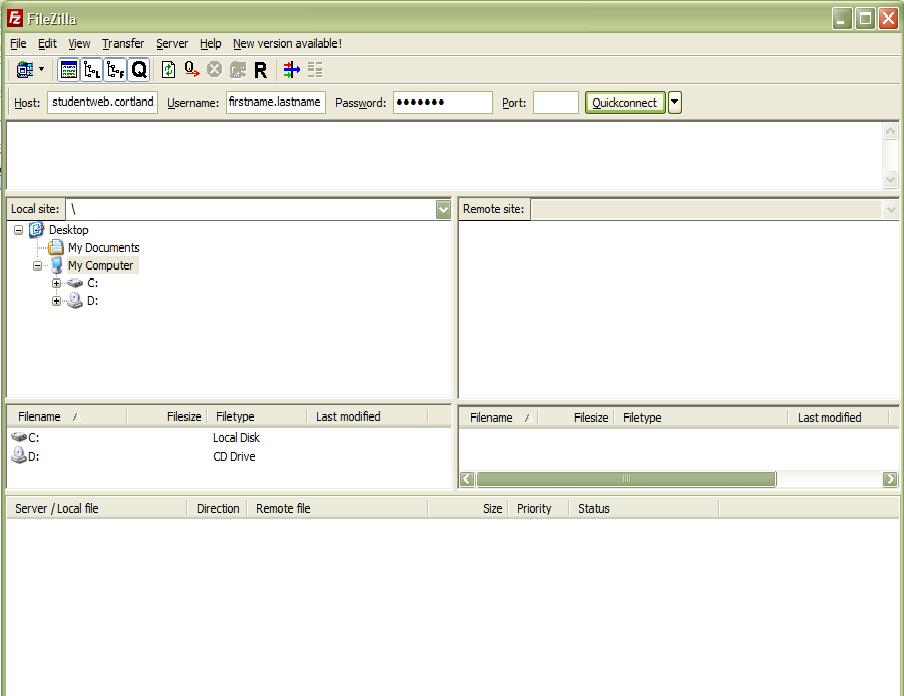
7.1 Open File Zilla (FTP) and you will see a pop-up window
Host: studentweb.cortland.edu
Host Type: Automatic Detect (by default, or choose this from the drop down menu)
Username: Your Cortland NetID, i.e. firstname.lastname. For example: amanda.bishop
Password: the same password you use to log onto any lab computers on campus, which is also the same one you use to check your Cortland email. .
Leave others blank and click Enter on your keyboard, or click Quickconnect next to "Port", your should connect to your website
7.2 Transfer the webpage you just created that is named "index.html" to the Cortland web server
Locate your index.html from your local drive (your flash drive in this case) in the left-hand side window. Use the bottom arrow to upload your index.htm file to your Cortland web server.
Step 3. Access your Pages: How to find your URL8) Accessing your pages
To access your web page, you need to know the web address, which is also called the URL (Uniform Resource Locator). Your URL to access your web pages is http://studentweb.cortland.edu/ followed by your NetID/Username (firstname.lastname). For example, if your name is Amanda Bishop and your first web page is top.html, then the URL is http://studentweb.cortland.edu/amanda.bishop/top.html. So here is the formula:URL: http://studentweb.cortland.edu/username/filename.htm
http:// tells the Web-browser to use the hyper text transfer protocol.studentweb.cortland.edu tells the browser to go to the Cortland web-server computer.
username (firstname.lastname) tells the browser to go to your account on the Cortland web-server computer.
filename.htm tells the browser to go to that file on your account.
9) About the special file "index.html" (your default homepage)
A page named index.html is automatically created when you create your folder and is the page that opens by default when you access your URL without specifying a page. index.html is a special file and it is your homepage “by default”, that is, you can omit the file name "index.htm" and the URL of your homepage is: http://studentweb.cortland.edu/firstname.lastname/
Note: It is crucial that your main page for your website be named "index.html" If you do not have an index.html in your Cortland Web folder, your website WILL NOT WORK.
Here is the URL for different kinds of files in your webfolder: http://studentweb.cortland.edu/username/filename
filename is the name you give to a file with the right extension. It can be any kind of file:
.html web page
.doc word file
.ppt PowerPoint
.jpg or .jpeg image
File names: avoid pitfalls When naming a file, avoid using space, capital letter or other special letters. Thumb of rule: use lowercase letters, no spaces, but make it easy to recognize what the content is.10) Practice creating another page named "practice.html" and publish it.
Hope this is not your feeling today... likely it might very well be ;-)