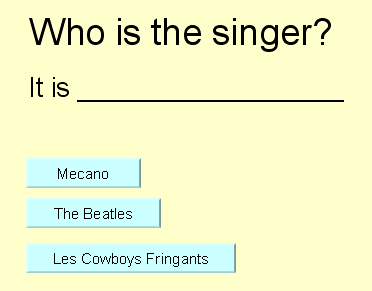
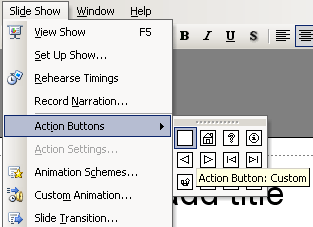
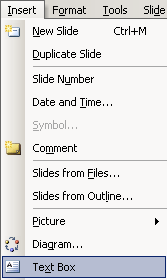
| To make an animation within the PowerPoint slide, we first need something to animate. We could use text, images, or anything on the page. Use Insert / Text Box to make the three text boxes for the correct answer and the two wrong answers. Format the text using text size, color, bold, etc. Whatever you think is best. Then move the three text boxes to their final positions. |
 |
Now, we need to set up the animation for these three text boxes. We will make them fly in from the right of the screen to avoid making them pass over any other text (generally an ugly distraction to be avoided).
Display the Custom Animation task pane in PowerPoint. You can do this by right-clicking on the text box and selecting Custom Animation, by selecting Slide Show / Custom Animation, or by using the drop down box in the right hand pane.
Next, select the text box that you wish to animate. We'll start with the Mecano! text box.

In the Custom Animation task pane, select Add Effect. Use Entrance / Fly In. Change From Bottom to From Right. of course, if you prefer, you can use a different effect. |
|
Now we will link this effect to the appropriate Action Button. The default trigger for the new effect is Start: On Click. The only other options under Start are With Previous and After Previous, but we can find more options by selecting the Mecano text box shape. The drop down box gives access to additional Effect Options and Timing.
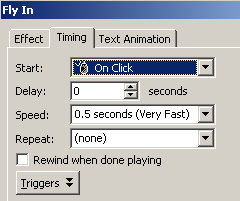
By selecting Trigger, we see that the default trigger is set for the Fly In Effect. The animation will occur in the normal, linear sequence of clicks on the slide. |
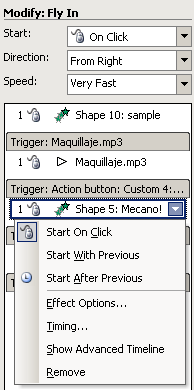 |
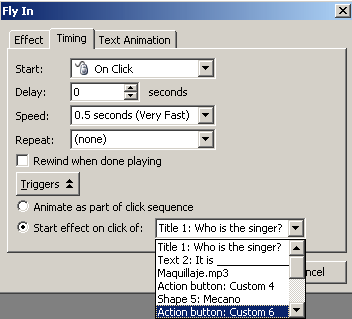
To change this click sequence, we will open the Triggers. This gives us two additional options, Animate as part of click sequence or Start effect on click of. A drop down box gives is a list of objects on the page that can be clicked. Here we can select the Action Button that corresponds to the Mecano answer.
Do the same thing for the two other feedback Text Boxes and their corresponding Action Buttons. |
 |
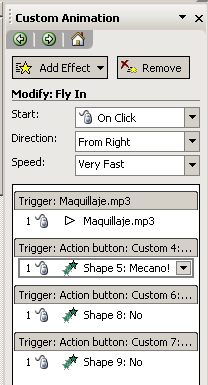
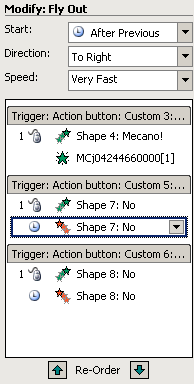
If you wish, you can take it up a notch by adding additional effects that will take place in sequence with the three main feedback effects that are started when the student clicks on each of those three buttons. As we see in the Custom Animation window to the right, for each of the three Animation Triggers, we now have a series of effects.
First we added a clip art smiley to the mecano button trigger. We set this to appear With previous so it will appear at the same time as the correct answer. We positioned this new effect chronologically in the sequence of effects right after the Mecano shape Fly In effect by using the Re-Order buttons at the bottom of the Custom Animation window.

This will let you put an effect with the correct trigger and order the effects under each trigger.
Next we added a Fly Out effect to each of the No feedback effects. We positioned them right after their associated Fly In effect, set them to Start After Previous, and gave them a Delay of a couple of seconds.
You can use multiple effects triggered by student input to make all sorts of things happen, but don't overdo it. |
 |
Finally, we need to insert the sound on the slide. We'll use Windows PCM wav format for maximum compatibility, converting the clip to mono, 22050 Hz.
It is possible to use mp3 sound format for linked files, but use wav format for embedded sounds.
Insert the sound from file (Insert / Movies and Sounds / Sound from file). We'll make the sound play when clicked, though we could have it play automatically if we wished. |
|
Caveat: embedded vs. linked !!!
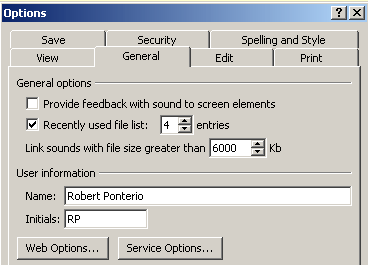
PowerPoint can be a bit confusing when handling sound files. It will, by default, use an absolute link to a file that is larger than 100kb, so when you move your presentation to a different computer, the sound will no longer work. To correct this problem, first tell PowerPoint to embed larger sound files within the presentation. Go to Tools / Options / General and change the number to a size that is larger than your sound files. We will use 6000kb.
Now when you insert your new sound object, it will be embedded in the presentation instead of linked. Embedding sound may slow your presentation down a bit, so take the time to think about whether embedding or linking is best for your venue. |
 |
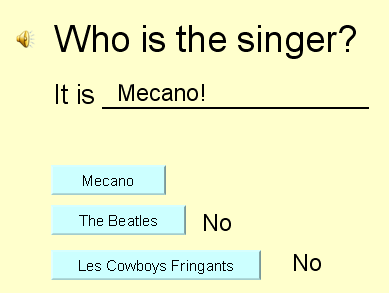
Here is the Whoisthesinger.ppt file with embedded sound.
|
|

