| Jean LeLoup & Bob Ponterio
SUNY Cortland © 2017 |
Your microphone should be suited to your recording equipment and to the sort of recording you are doing. Poor quality equipment or a noisy environment will introduce noise into your recording, interfering with the signal that you are trying to capture. Basically, signal is what you want, noise is the sound you don't want. An omni-directional mic picks up sound from all directions and is good for recording background sounds, music from several directions, or several people talking. A uni-directional mic is pointed at the sound coming from a single source - one speaker, one instrument, etc. Clip-on mics can do a great job recording individuals in conversations because they are placed so close to the person's mouth, but if you have more than one or two participants, you may need to think about mixing sounds from multiple mics to control different sound levels (some of the recordings might be louder than others). Table mics are nice for several people sitting around a table but will pick up the sound of someone touching or bumping into the table, shuffling papers, etc., so subjects need to take care if you use these. Boom mics can help avoid noise from objects. Microphones that are built into a tape recorder, camcorder or computer tend to pick up machine vibrations from motors (more noise) and are difficult to place close enough to a subject. Digital recorders help avoid this problem because they have no moving parts. A too long microphone cable may act as an antenna that could pick up static from fluorescent lighting or even the signal from a local AM radio station.
If a microphone's specifications include "signal to noise ratio", a high signal to noise ratio will sound best. Another way to improve your microphone's sound is to use a pre-amp (see below).


The sound circuits in a computer can create sound, process sound from input sources, and send sound to output destinations. A sound recorder may capture sound from a microphone (mic in) or from an audio device (line in). It is possible to control which source will be used by opening the volume control. This utility controls the output or playback volume of a number of devices (microphone, line in, CD audio, midi, wave, etc.).
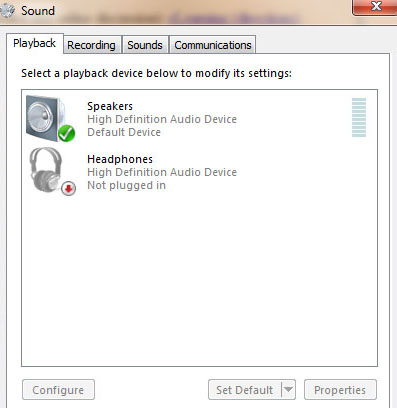
For Playback
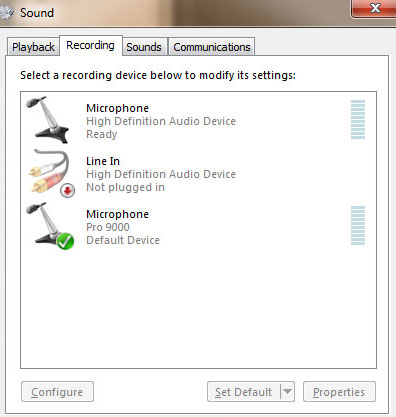
For Recording, you might need to try different sound input ports to be sure you have one that works well with your microphone. These might be on the front or the rear of the computer or may be at the back of a sound card or even in a USB port or webcam. One of these selections can be set as the default recording source in the Recording Devices property such as this tab in Windows 7/8/10. If you are using a program such as Audacity, you can select one of the recording (input) devices directly in the program.
In Windows 7 or 8 or 10, the microphone levels will likely need to be adjusted through the microphone properties. You may have to tweak the settings (sound levels) in the microphone properties tab (Microphone boost and Microphone level) to find the level that works best for your devices and environment.
Note that if you are trying to adjust the levels but you are still not getting any sound, you might be adjusting the wrong microphone!
Note that you can also record the sound being played by your computer (for instance rom an online radio program). For this you need to enable the Stereo Mix frature in your sound recorgind options.
Pre-Amp: The quality of microphone inputs can vary enormously from one computer to another. If you need better quality recording from a microphone, it may be worth investing in a pre-amplifier that will amplify the microphone input. This gives you more control over strength of the signal that your computer receives. The sound card in your computer probably has a pretty cheap amplifier for the microphone. A decent pre-amp will do a better job boosting the microphone's signal. This is likely to be overkill for most applications.
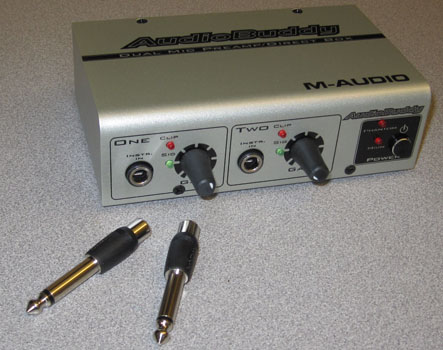
The output from the pre-amp would then be plugged into the computer's line-in jack (rather than the microphone input jack). When using a pre-amp, you may need to be careful of clipping in both the pre-amp and the computer sound input.
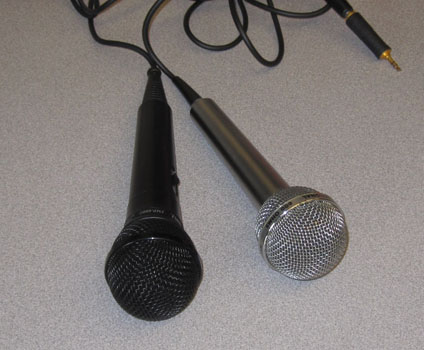
Microphones may be unidirectional (best at capturing sound coming from a single direction) or omnidirectional (captures sound coming from all directions). Microphones can also be mono or stereo. Plugging a mono microphone into a steeo jack may result in unwanted noise on one of the channels.
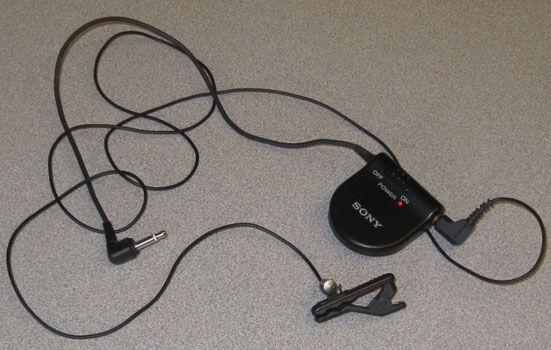
Amplified Lavelier mics clipped onto the speaker's clothing have the advantage of getting more of the speaker's voice than background simply because they are close to the speaker. A good option for wireless Lavelier mics is the Audio-Technica ATR288W. These work great of the subject might be moving around.
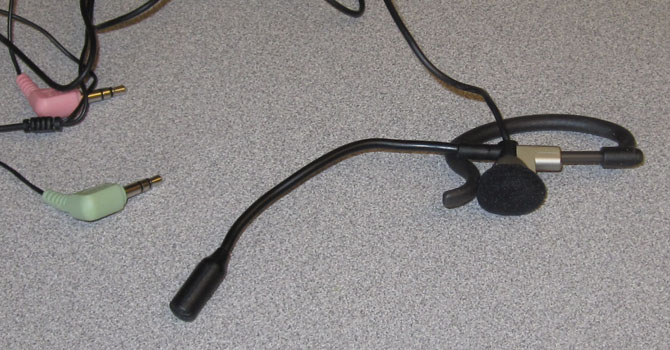
For quick interactive communication, a simple monophonic mic & earphone are very easy to set up without wasting time.
USB sound recording devices
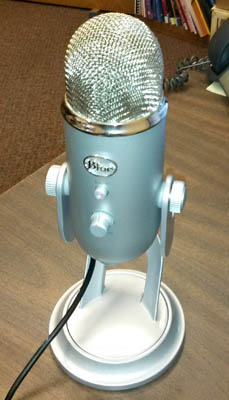 |
Some microphones connect to the computer using a USB connection. Since USB is digital, the quality of the sound will depend only on the quality of the USB microphone. Some more expensive USB microphones such as the Blue Yeti have high quality analog to digital conversion, multiple configurations (stereo, omni-directional, cartoid, figure 8, and built-in monitor jacks. USB Webcams usually also have built-in microphones; so you could also use your webcam as a microphone. Their quality varies considerably. |
Other personal recording devices
Most people already have a variety of devices that might be capable of recording sound. Your voice recorder, iPod, mp3 player, or cell phone, especially a smart phone with a voice recording app can be used to capture sound and then transfer it to your computer. Get to know your own device. Where are the sound files located? What format is used (WMA, M4A, MP3)? How can you transfer them easily to your computer? Make sure that your sound editor is configured to edit your sounds and save them as mp3.
Sound Recorder
One of the oldest ways to make a recording using Windows' built-in tools is to open the entertainment accessory, (start / all programs / accessories / entertainment) Sound Recorder. Click on the red recording dot to begin. Save the file in .WAV format using File / Save, and be sure to select File / New to begin another recording from scratch. Under the menu (Edit / Audio Properties / Customize) it is possible to select a particular frequency and resolution other than the old default 22,050 Hz 8 bit mono. The best frequency and resolution are always a tradeoff between quality and size. Music is more demanding than voice. We recommend using at least 22,000 Hz 16 bit for voice recording for projects in this class. However, we absolutely do NOT recommend using Sound Recorder at all! You can download free software that is infinitely better.
Sound Recorder from Windows 7

| Samples | ||
|
|
44kHz, 8bit, 90 KB |
22kHz, 16bit, 61 KB |
22kHz, 8bit, 45 KB |
|
8kHz, 16bit, 16 KB |
8kHz, 8bit, 13 KB |
|
A much greater degree of control and more extensive features for manipulating sound files are available in sophisticated sound applications Adobe Audition, and Sound Forge. The main features needed are selecting and cropping a sound as you might a photo, normalizing a sound as you might adjust the brightness of a photo, and saving the sound in a variety of formats commonly supported by multimedia applications and Web browsers.
The Edit / Trim menu will crop (or trim) a selected portion of the
sound. File / Save as... offers a wide variety of options
including
.AU .WAV, .RA (RealAudio), and .Mp3. Mp3 format is widely accessible and uses an excellent
compression CODEC (compression-decompression) to make file size smaller while maintaining very
good sound quality.
Audacity
Audacity is a good quality, free sound editing program that has all the features you are likely to need. http://audacity.sourceforge.net/
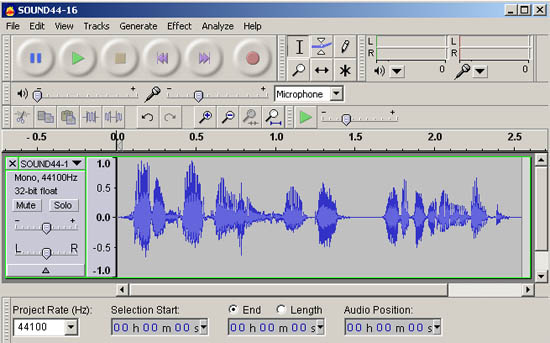
Sound editing will be covered in a later lesson.
There are also other low cost programs available for sound editing that will do a fine job for most of your needs.
There's an App for that.
| Your cell phone could be used for this function as well. There are lots of free sound recorders that turn your cell phone into a digital voice recorder. One example is Hi-Q MP3 that has lots of useful features. Paired with a utility like AirDroid that provides wireless file transfer between phone and computer over the Internet, or by using utilities such as Google Drive to transfer the files wirelessly, one can quickly capture audio without any significant setup time or need to configure the computer microphone properties. The sounds can then be transferred to your computer without having to connect a wire. | 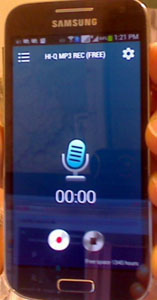 |
Recording Tutorial:
http://www.nch.com.au/kb/10010.html
Equipment for Audio Recording of Speech:
http://www.phon.ucl.ac.uk/resource/audio/recording.html
Audacity 2.0 Manual
http://manual.audacityteam.org/o/
Audacity Tutorial for Podcasts
http://www.howtopodcasttutorial.com/17-audacity-tutorial.htm
Sound Advice: 10 Tips for Better Audio Gathering:
https://www.videomaker.com/article/c4/9426-sound-advice-10-tips-for-better-audio-gathering
Sensitivity of the Human Ear:
http://hyperphysics.phy-astr.gsu.edu/hbase/sound/earsens.html
Sound recording: Microphones:
http://www.hrelp.org/archive/advice/microphones.html
How to Create Your Own Podcast - A Step-by-Step Tutorial
https://www.thoughtco.com/how-to-create-your-own-podcast-2843321
HOW TO MAKE A SUCCESSFUL PODCAST
https://www.digitaltrends.com/how-to/how-to-make-a-podcast/2/
Call Recording - Record a guest for your class over the phone
https://www.tapeacall.com/blog/make-podcasting-easy-with-iphone-and-android-call-recording/