| Jean LeLoup & Bob Ponterio SUNY Cortland © 2017 |
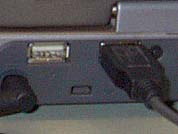
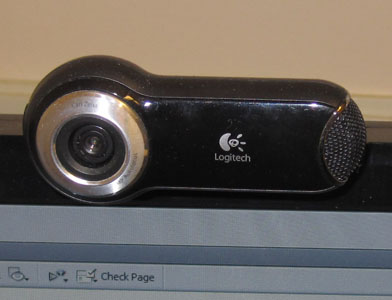
| Current webcams come with proprietary software and attach to the computer via a USB connection (high speed serial connection). There are many different webcams available with a wide range of hardware and software features. | |
The software manages taking single photographs and saving them in a variety of image file formats, capturing short video clips, and also providing a variety of other functions such as remote monitoring, motion detection, or time lapse video. It allows you to set the image resolution (size) as well as other characteristics of the images. Today's webcams are a huge improvement in image quality compared to those in use when we began teaching this course.
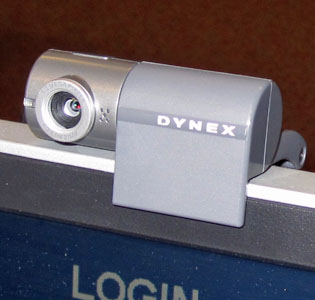
Some cameras require software to function at all, while others (the Dynex pictured here for instance) can simply be plugged into any USB port, without installing its own drivers, to interface with other software (such as Skype). This feature makes such cameras more portable and so easier to use in a lab environment.
 |
|
|
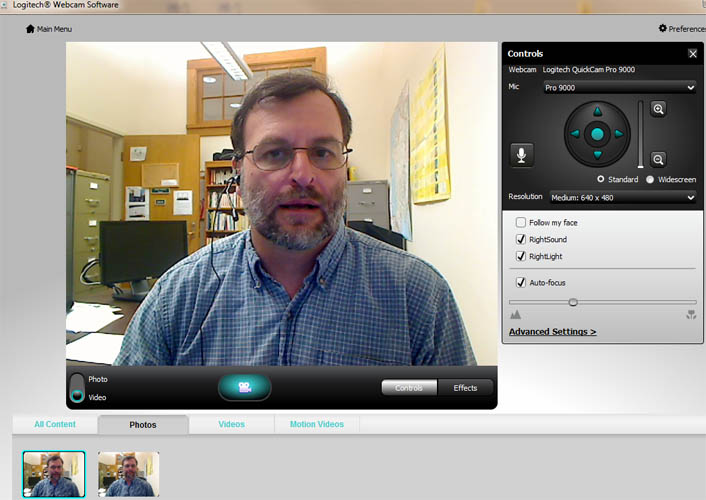
Higher quality cameras with glass lenses and higher resolution might be better for videoconferencing with an entire class. This is especially true of you plan to use a camera's zoom feature. An example is the Logitech C615 that has 1080p resolution and can be mounted on a tripod for under $50.
Higher quality webcams also may have higher quality microphones that generate less noise and do a better job recording your voice.
|
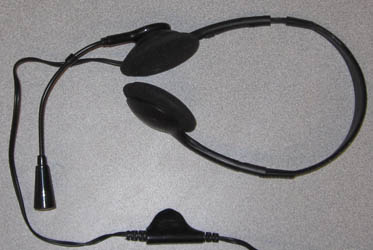
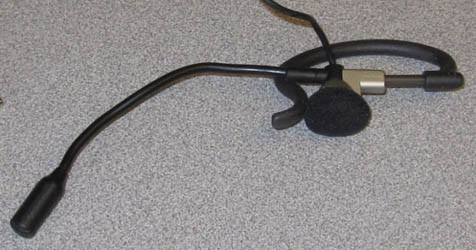
The cameras pictured here also include a built-in microphone. Depending on individual preference and the environment where videoconferencing will take place, a separate headset with built-in mic can be preferable for privacy and better capture of the speakers' voices (as opposed to background sounds). |
If videoconferencing with several students or a whole class, it might be useful to have a wireless microphone (perhaps in addition to a separate microphone for the whole class. This can make it easier for individual students to be heard on the other end.
Webcam software included with your webcam allows you to select from a range of standard image sizes before you capture your picture. They generally include timers, useful if you are photographing yourself. Once you have taken a photo, the image file will be stored in a predetermined location on your computer's hard drive. As is always the case, be sure to keep track of where the image files are stored. Move photos that you have taken to the folder for your project and change the file name to something meaningful so you don't lose track of what it is (image213 is not a good name!). You'll probably will want to edit the photo in an image editor such as PhotoShop, to crop out unneeded areas of the image, and to compress it for your application (such as web site development). |
 |
Desktop video capture works essentially the way photo capture does. You could use the software that may have come bundled with your camera or you could use other software such as Windows Live Movie Maker. Here too you can select a video size or resolution that is appropriate to your application. Position the camera and make sure that your microphone is satisfactory and you have adequate lighting. Video capture with a webcam is very easy and can be a great way to prepare short instructional videos that can be included in online lessons. These videos can be embedded on a web page or downloaded for the student to view and save locally. They can be uploaded to social media sites such as YouTube or TeacherTube. Lessons can be stored for use in distance learning, for students who miss a class or simply for someone who wishes to review. (n.b. On a Mac, you may need a plug-in to play this WMV video.)
|
This version uses mp4 and HTML-5 instead of wmv video.
|
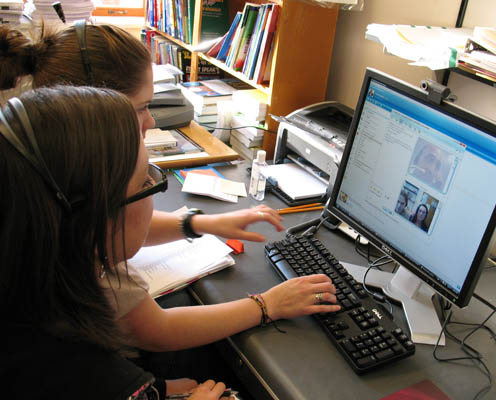
Desktop videoconferencing over broadband Internet connections offers audio and video quality capable of supporting remote instruction in languages. Software applications such as Skype include utilities for sharing full screen or individual windows that let teacher or student share authentic materials or student work, providing a context for interactive communication or feedback supporting improved accuracy. In addition to two-way communication, it is also possible to share video among multiple participants. Finally, the teacher or student can capture the video session for later review, critique or analysis.
 |
Internet Messaging systems such as Skype, Yahoo Messenger, Windows Live Messenger, etc. use webcams to provide video for Internet based desktop videoconferencing. We will examine some of the features of Skype.
In Skype, while in a conversation, you can share your screen or share just a part of your screen with your conversation partner. This can make it possible to show a video, a web page, a document, a photo. Indeed anything that can provide a context for interactive communication. Teachers can view and comment on student work using this method as well. One of the issues in desktop videoconferencing is a certain discomfort due to lack of eye contact that is important for turn-taking. This can be compounded by cultural and linguistic differences in turn-taking cues. A simple, though incomplete solution is to always place the videoconferencing window either in full screen mode or at the top of the screen, as close as possible to the camera. The teacher can also try to make frequent eye contact with the camera. |
Here is a sample video of online tutoring lesson using Skype at SUNY Cortland with an English language learner in Brazil. A number of tools are available to capture a Skype conversation for later review by either party (see below). When preparing to use desktop videoconferencing for instructional purposes, always be sure to set up & test the equipment & connection (including sound & light levels) before attempting a lesson. You certainly cannot waste lesson time trying to adjust settings or fix technical issues. The technology cannot be allowed to get in the way of instruction. In case of technical problems, do not try to make repairs during a lesson. Have a backup plan so all parties know what to do in case something goes wrong. Fro instance, if a slow connection or heavy Internet traffic interferes with video quality, stop the video & do audio only. If everyone knows ahead of time what the backup plan is, you will not have to waste class time explaining. If you can't share authentic materials via the Skype connection, be prepared to send the files via Skype, send them through email, or have them in place on a web site or in a course management system online where the student can access them. |
The video below is in Quicktime (MOV) format. |
| |
The video below is in mp4 format. |
Skype Capture
Call Graph: http://call-graph.soft112.com/
IMCapture for Skype: https://alternativeto.net/software/imcapture/https://alternativeto.net/software/imcapture/
Pamela Call Professional Edition (can record video): http://www.pamela.biz/en/
VodBurner: http://www.vodburner.com/
SuperTinTin: http://www.supertintin.com/
YOUR SKYPE CALLS DON’T HAVE TO DISAPPEAR! HERE’S HOW TO RECORD THEM FOR LATER
https://www.digitaltrends.com/computing/how-to-record-a-skype-call-on-your-pc-or-mac/
6 Creative Ways to Use Skype in the Classroom: http://www.edudemic.com/skype-in-classroom/
Skype Across the World in your Classroom!: http://www.brighthubeducation.com/teaching-methods-tips/76557-setting-up-and-using-skype-in-the-classroom/
A window on the world: Using Skype in the classroom : http://www.learnnc.org/lp/pages/6573
The Complete Guide to Using Skype in the Classroom: http://www.educatorstechnology.com/2012/06/complete-guide-to-use-of-skype-in.html
Cool ways to use Skype in the Classroom: http://www.teachhub.com/using-skype-classroom
50 Awesome Ways to Use Skype in the Classroom: http://www.teachingdegree.org/2009/06/30/50-awesome-ways-to-use-skype-in-the-classroom/