Jean LeLoup & Bob Ponterio
SUNY Cortland
© 2020 |
Wireless Sound - Setting Up an Inexpensive Classroom PA System
In this lesson we will go through the process of setting up an inexpensive classroom public address system. This can be used for a large classroom if a microphone system is not otherwise available. It could also work for mini conferences or workshops. Our inspiration for this was the advantage of amplifying the teacher's voice during the COVID-19 pandemic to improve communication through a mask and to reduce virus spread when a loud voice is projected. Although it would be nice to be able to use one's cell phone to set up such a system, we have found that this produces a delay that makes the cell phone unusable as a mini PA system.
We will set up the PA system using a wireless microphone and a classroom computer. Wires always get in the way. A wireless mic has the advantage of mobility for the teacher, making it much easier to move around the room if necessary. Since we are only projecting voice, we can use a very inexpensive wireless microphone system ($20-$50). Although no software is required to make this work, there is free software available that can make this much easier to set up.
1. Wireless Microphone
A wireless microphone has two principal components, a transmitter that the microphone is plugged into and a receiver that plugs into the computer or sound system. Many different wireless microphones can be purchased at a reasonable cost. Some of the features one should be aware of are:
- Adequate battery life
- Microphone type: lavalier (lapel) or headset
- Plug type: mini vs. 1/4 inch, stereo or mono
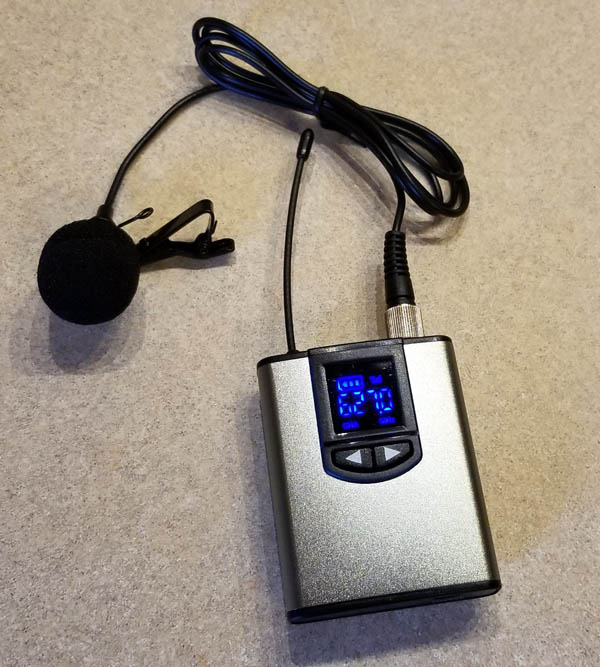
The microphone plugs into the receiver.
In this image, we see a lavalier (lapel) mic. It has a mini plug.
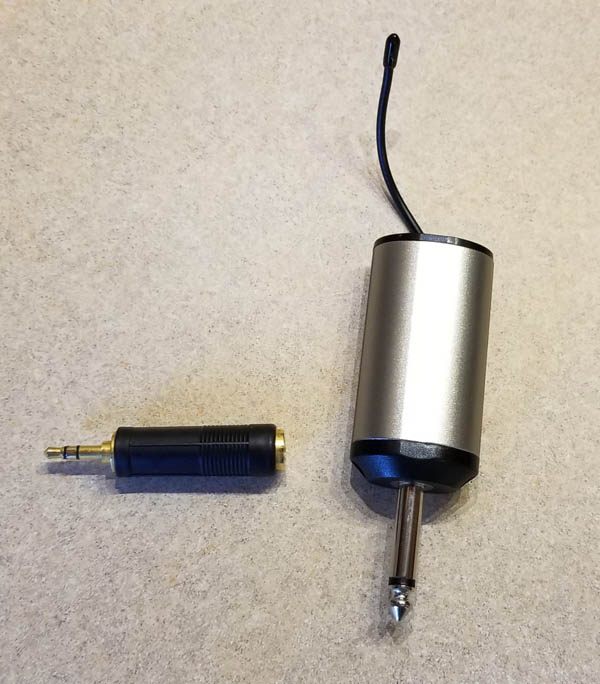
The receiver could have a mini plug or a 1/4 inch plug. It could be mono or stereo. An adapter (shown here) might be needed to allow the receiver to fit the computer microphone mini jack. The computer probably has a stereo mini jack.

Be sure to plug the receiver into the microphone jack, not the headphone or aux jack.
A lavalier or lapel mic is a good choice because sound tends to be better if the microphone is close to the speaker's mouth. Another option might be a headset mic. Hand-held microphones or microphones in web-cams tend to be awkward or be too far from the speaker to produce the clearest sound.
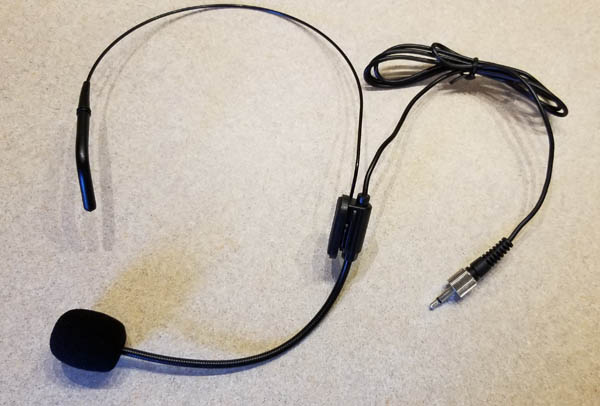
The headset mic might produce a better sound because it is even closer to the speaker's mouth. But the lavalier mic might be more comfortable for the speaker. It's a matter of personal preference. Many wireless microphone kits come with both.
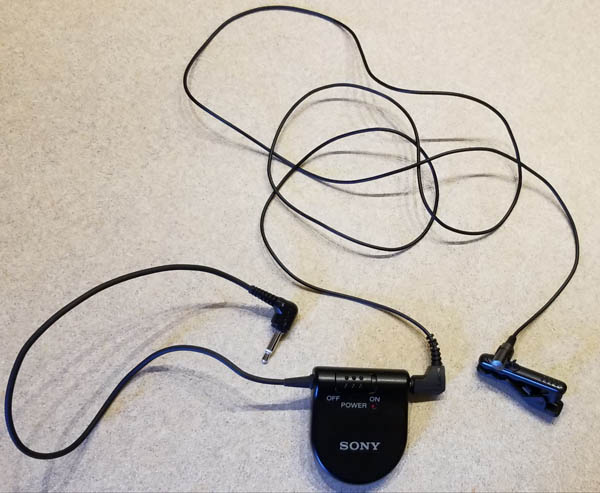
If you already have a higher quality microphone that you prefer to use, this should work fine in place of a microphone that comes with any wireless microphone system. Of course, an adapter might be necessary depending on the specific devices used. Some microphones, for example, have the larger 1/4 inch plug. Such adapters are inexpensive and easy to find.
2. Software setup
There will likely be more to getting the wireless microphone, or any microphone for that matter, to work with your computer as a PA system in real time. Simply plugging the microphone into the computer's microphone jack should allow you to record audio, but this sound generally does not automatically play through the computer speakers, which would tend to produce feedback. If you already have another microphone plugged into the computer, for instance in a web-cam, you may also need to specify which mic to use.
In order to allow the microphone to play through the computer speakers on a Mac or PC, there are two options. Either adjust the sound control panel settings (complicated) or use software that controls the audio automatically (much easier). Although we do not recommend the more complicated route of setting this up through the system control panel settings, we include those directions here for Windows 10:
On a Windows 10 PC, we can adjust the sound settings to listen to the mic through the speakers. There are two ways to do this on the PC. There is a setting on the microphone control panel and another on the speaker control panel. The one on the microphone control panel generally a slight, annoying delay, but the one on the speaker control panel has no delay. Go figure!
This works fine, but it is too complicated for most people. Here are the "far too complicated" instructions in case you are curious:
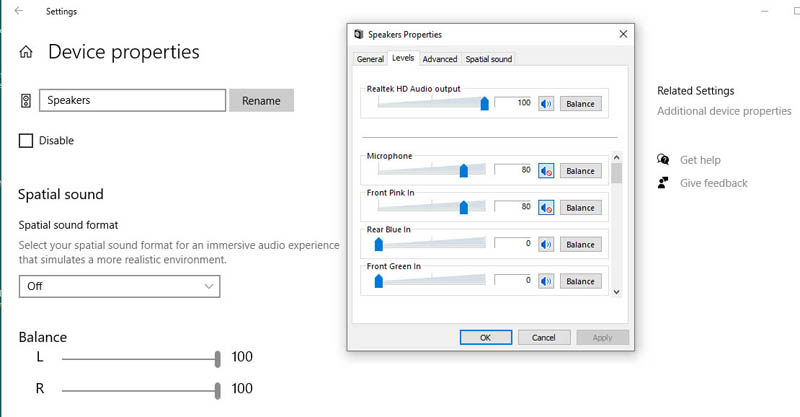
Open the settings, go to Sound Settings, under Speakers click on Device properties, under Related Settings click on Additional device properties, select the Levels tab, find the Level meter for the microphone you are using and click on the speaker icon to remove the red "Do Not" symbol to activate the mic to speaker connection. In the example above, the Microphone Level is actually the microphone in a web-cam, and the Front Pink in Level is the one for the wireless mic. You might also have to adjust the level to get adequate loudness without feedback. (See, I said it was complicated!)
There is also a way to make this work on a Mac, perhaps through the Audio Midi Setup in Utilities, but I don't have a Mac to test this.
A better approach:
Free Software can be found for PC or Mac that can make the adjustments for you much more quickly and easily. We prefer something that doesn't take time to set up and doesn't make us change the computer settings. One such free program that handles this on a PC is called VoiceMeeter. We don't think there is a Mac version, but there are several Mac programs that might work. Perhaps: Loopback, Audio Hijack, Sound Flower, but we have not tested these.
Using Voicemeeter, https://www.vb-audio.com/Voicemeeter/, there is no need to make any changes in the system control panel.
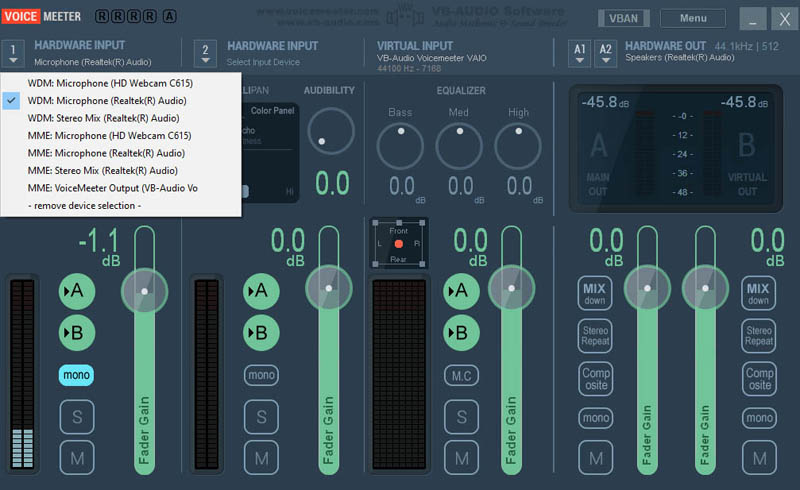
In VoiceMeeter, under Hardware Input we select WDM Microphone (which is the microphone on this system). Then under Hardware Out we select WDM Speakers. These settings might be a bit different on different computers depending on the device driver that your system uses for sound. There was also an MME Microphone option that we tried, but this resulted in a delay, so the WDM option worked better. (I assume this is like the difference between the microphone and speaker options mentioned above in the control panels.) This worked great. No delays. No time wasted setting it up each time. Just run the program, and it should take care of the setup after the initial configuration.
3. Testing the microphone
Be sure to test the system before trying to use it in class. Make sure that the audio level is loud enough. Also make sure that there is no annoying feedback. You don't want to try to fix problems when you should be teaching.
For more information:
Return
to Syllabus