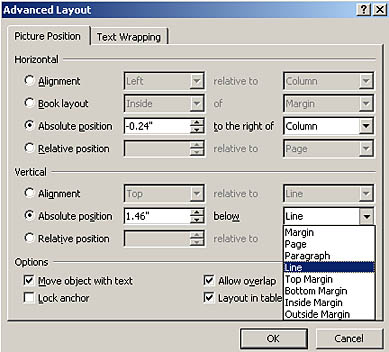
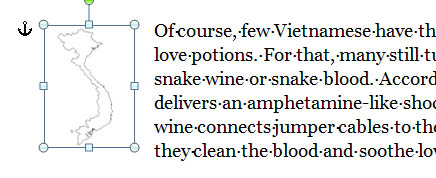
There are many different approaches to annotating a text. Information associated with a word or expression may be placed at the bottom of a page, at the end of a chapter, at the end of the document, in order of appearance, in alphabetical order, by grammatical category, by theme (body parts vs food items). A word processor will allow us to annotate text by creating a footnote or endnote. When the reader has to stop reading, turn to the back of the book or even the bottom of the page, and locate the word, the reading process is interrupted so the reader may choose to ignore many glosses when they interfere with reading to such a degree. We may also prefer to place the cue to comprehension of a word on the same eye level in the margin on the page where the word itself is found. This method may be less intrusive, interrupting the reading process to a lesser degree, but this might also encourage readers to interrupt the reading process more frequently, perhaps for words that really did not need to be checked. So we see that any technical style of glossing can have both advantages and disadvantages. For marginal notes, many word processors allow us to create text boxes that may be anchored to the line in which the glossed word is located. This method will allow the annotation to move with the word if the text is modified or reformatted.
In this exercise we will take a text from a newspaper article on the Web, reformat the text for proper word wrapping, and insert text boxes for our annotations.
Step one - get the text
- Find an article in an online newspaper of your choice from
the FLTEACH Resources page or any online newspaper of your choosing.
- Use your cursor to select the text that you wish to copy. Copy the text (ctrl-c) along with any pictures that go with it, photo captions and credits, headlines, publication logo, author, date, etc.
Then paste the text into your word processor. You might need to perform multiples pastes for articles spread over several pages or to avoid copying extraneous items. We will use Microsoft Word 2007
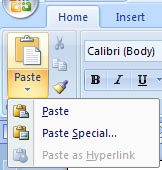
in our example, but the process is the same in 2010 or 2013 versions. Here the Paste button in the upper left allows several options. It is also possible to use ctrl-v to paste.
Step two - reformat the text
- In some instances, you may not need to reformat, but pasted text may contain formatting that you do not like (text size, color, unwanted line breaks, odd column widths). If a particular pasting technique does not produce the desired results, you can always use the undo feature. |
 |
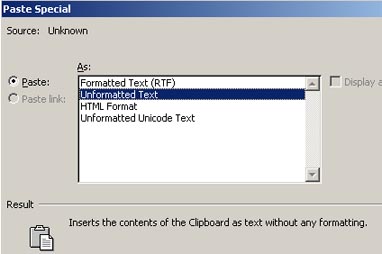
- If fixing the formatting is too complicated because there are too many problems, you might need to use Paste Special / Unformatted text for all or part of the copying process. This will paste the text only, allowing you to format from scratch without dealing with any odd formatting codes that might have been used in the original. On the other hand, it can be effective to try to keep as much original formatting as possible for authenticity. So you may wish to make your copy resemble the original format as much as possible: banners, dates, by lines, photos, narrow newspaper columns, etc. |
|
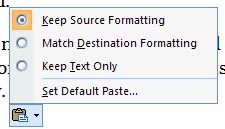 |
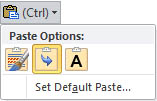
Another option is to use the format options in the paste format icon that appears in Word at the bottom of any pasted text. In this case, after basic pasting using ctrl-v, you can change the format to use the source or destination formatting or to paste only the text portion of the clipboard contents. |
- Remove any symbols, images or text that you do not want.
- Remove any unwanted blank spaces at the beginning of lines or in other parts of your text.
- Remove any unwanted paragraph or line breaks within the paragraphs of your
text if necessary.
- Remove unwanted formatting elements such as hyperlinks, underline, bold, italic, text colors. Naturally, you should leave any that you do want to keep.
(The search/replace feature of your word processor may be useful in making
some repeated changes. One useful trick if paragraphs appear to be messed up is to place a special symbol at the start
of each paragraph "$$$", remove all paragraph markers (^p), then replace the symbols
with new paragraph markers.) In general, MS Word tends to do a good job copying what you expect from a web page in a format that is usable, so you are likely to have little reformatting to do.
- Change the right or left margin to make room for your annotations. (You may need to select the text for which you wish
to change the margin. Should this new margin apply to your entire document or just to the annotated text?)
Step three - add a text box to position your gloss
- First place your cursor on the word that you wish to annotate. You might also wish to mark the annotated word with a symbol, perhaps an asterisk In MS Word, select the menu item Insert / Text Box.
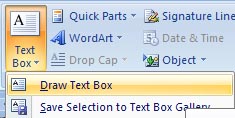 |
If you wish to draw a text box, Word will give you a drawing cursor so you can draw the text box in the margin. Draw your text box in the location and to the size that you wish. |
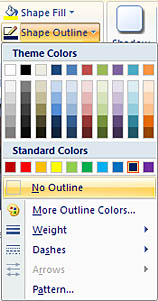
| Your standard text box will have a thin line around it. |  |
Word can also provide a gallery of text box formats for you to choose from and can save a box that you design with a specific format that you might want to use often.
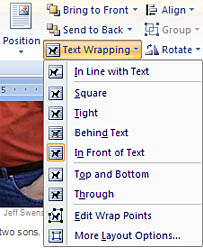
- It is possible to right-click on the text box and select Format text box, but I recommend double clicking on the textbox border to open the Format Textbox ribbon for Text Box Tools. This allows easy access to a wide range of options.
