Installing RealEncoder
First, you will need to install the RealProducer Basic on your machine. You can find this program in the Instructor's folder on the Instructor's machine.Compression
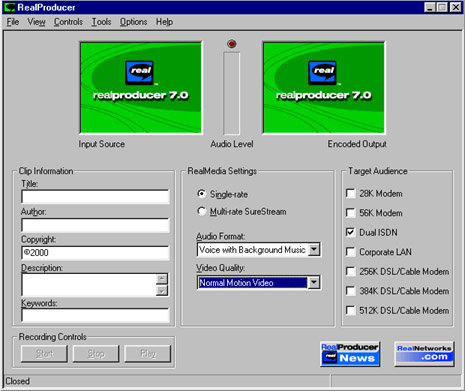
1. Launch RealProducer by clicking on the RealProducer icon on the desktop or the Start menu. You should get a window that looks like this: |
This is the RealProducer window
or dialog box. Here you will need to specify the title of
your video or audio clip, the author, and the copyright
information.
If you made the clip, you hold the copyright. You can also include a
description
and keywords if you wish.
Single-rate compresses the file to a single level of compression; the multi-rate setting allows a streaming server to adapt to different badwidth requirements. Audio and video format settings allow you to make adjustments for the type of media you have. The target audience setting actually controls the level of compression. |
 |
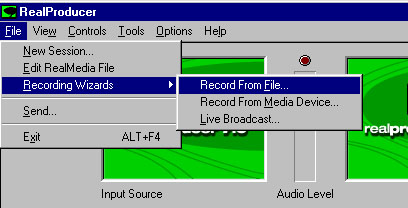
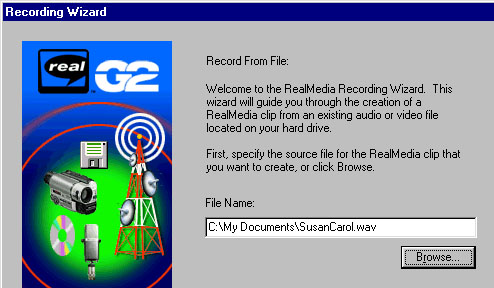
It is possible to use a Recording Wizard to walk you through the process if you are unsure of the settings that you need to make. Look for Recording Wizards under the File / Recording Wizards menu. You will be likely to record from a file if your media has already been captured and edited. |
 |
Next, select your file by browsing to its location on your hard drive. |
 |
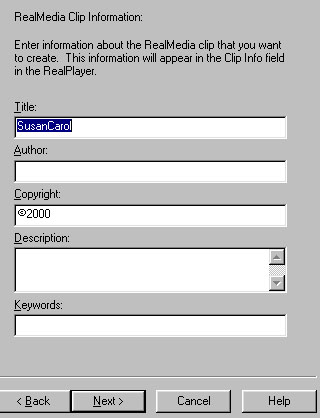
The Recording Wizard will then walk you through the process
of inserting
the information you need and making the appropriate settings.
Subsequent windows select: Single-rate or multi-rate |