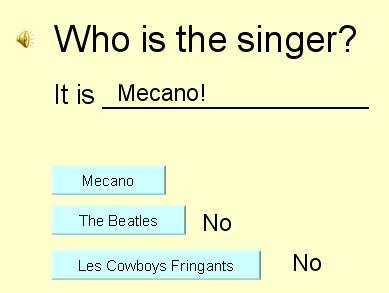
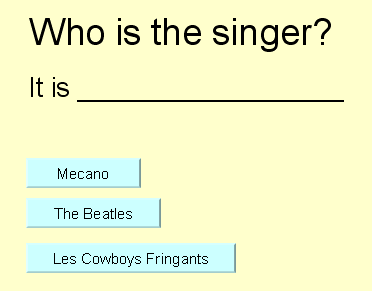
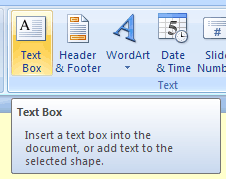
| To make an animation within the PowerPoint slide, we first need something to animate. We could animate text, images, or anything on the page. Use Insert / Text Box to make the three text boxes for the correct answer and the two wrong answer feedback texts. Format the text using text size, color, bold, etc. Whatever you think is best. Then move the three text boxes to their final positions. |
 |
Now, we need to set up the animation for these three text boxes. We will make them fly in from the right of the screen to avoid making them pass over any other text (generally an ugly distraction to be avoided).
Display the Animation Pane in PowerPoint. You can do this by selecting Animations / Animation Pane. Make sure that you can see the Ribbon for your options.
Next, select the text box that you wish to animate. We'll start with the Mecano! text box.

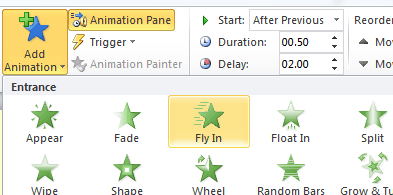
In the Animations Ribbon, select Add Animation. Use Entrance / Fly In. Change the Effect Options From Bottom to From Right. Of course, if you prefer, you can use a different effect. |
|
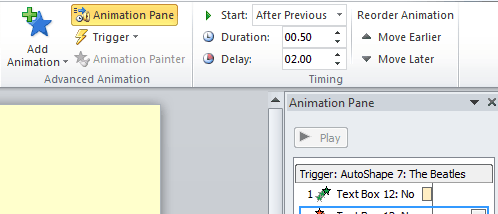
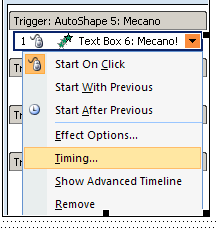
Now we will link this effect to the appropriate Action Button. The default trigger for the new effect is Start: On Click. The only other options under Start are With Previous and After Previous, but we can find more options by selecting the Mecano text box drop-down box (see the image to the right). The drop-down box gives access to additional Effect and Timing options.
Double-clicking on the animation effect will also open the effect options window. |
 |
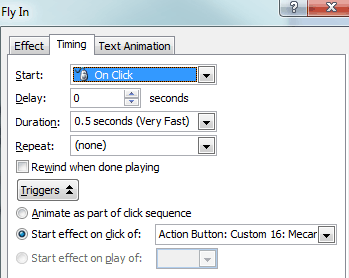
By selecting Trigger, we see that the default trigger is set for the Fly In Effect. The animation will occur in the normal, linear sequence of clicks on the slide.
To change this click sequence, we will open the Triggers. This gives us two additional options, Animate as part of click sequence or Start effect on click of. A drop down box gives us a list of objects on the page that can be clicked. Here we can select the Action Button that corresponds to the Mecano answer.
Do the same thing for the two negative feedback Text Boxes and their corresponding Action Buttons. |
 |
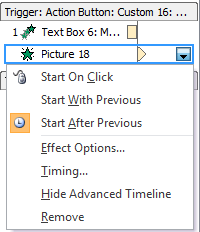
If you wish, you can take it up a notch by adding additional effects that will take place in sequence with the three main feedback effects that are started when the student clicks on each of those three buttons. In the Animation Pane, for each of the three Animation Triggers, we can have a series of effects.
First we inserted a clip-art smiley to the slide and added an animation to make it appear. We positioned this new effect chronologically in the sequence of effects right after the Mecano shape Fly In effect by using the Re-Order buttons at the bottom of the Custom Animation window.

This will let you position an effect with the correct trigger and order the effects under each trigger.
Then, we set the smiley animation to start after previous so it will appear right after the correct answer flies in.
To complete the animation of the wrong answer feedback, we added a Fly Out effect to each of the No feedback effects. We positioned them right after their associated Fly In effect, set them to Start After Previous. Then, we should give them a Delay of a couple of seconds so the student can see them.
You can use multiple effects triggered by student input to make all sorts of things happen, but don't overdo it or it can get messy. |
 |
Finally, we need to insert the sound on the slide. We'll use mp3 format for maximum compatibility, you can convert the clip to mono, 22050 Hz to keep the size down (of course, you can use higher quality and stereo if you wish). A copy of the mp3 sound will be embedded into the PowerPoint presentation file. Insert the sound from file (Insert / Sound / Sound from file). We'll make the sound play when clicked, though we could have it play automatically if we wished. |
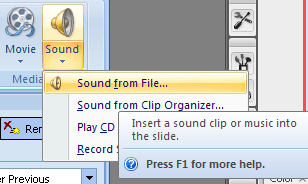 |
PowerPoint 2010, 2013, and 2016 allow you to embed mp3 sound files of any size. It also includes a control bar to allow the user to control the sound playback.
When you insert your new sound object (maquillaje.mp3), it will be embedded in the presentation instead of linked. So the sound is actually inside of your PowerPoint file, and you do not need to copy the original file with your presentation, as you must do with a web page. You can set your sound to play automatically by adjusting its animation effects from the animation pane as you did with the other animations. Start playing from beginning; Stop playing after current slide; Timing: start with previous. |
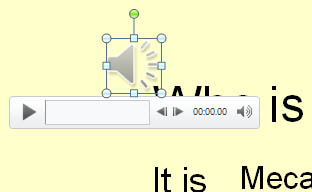 |
PowerPoint 2010-2013-2016 audio
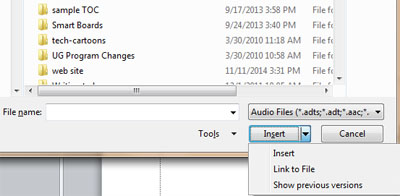
It is possible to link an audio file if you wish, for instance if you have a very large audio file that is used in several different presentations. When inserting the sound file through the "Insert Audio from File dialog, you can choose "Insert" or "Link to File".
Caveat: It can be very complicated to get your PPT presentation to find the linked audio file if you choose not to embed it. In other words, moving the Powerpoint presentation is likely to break the link.Techniques for dealing with such issues are beyond the scope of this lesson. |
 |
We will also prevent an accidental click from advancing our slide or terminating our presentation by unchecking On Mouse Click under Transitions / Advance Slide.
Because we have prevented background clicks from advancing the presentation, we need to add an Action Button to advance the slide explicitly.
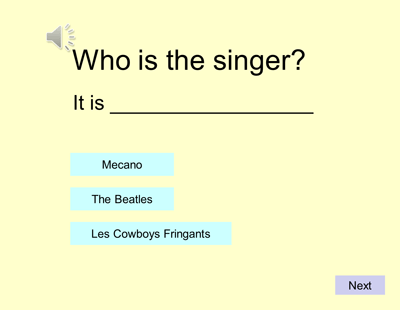
Here is the Whoisthesinger-ppt2010.pptx file with embedded sound.
|
|
